Writing better blog drafts starts with understanding how content structure shapes the reader's experience. Whether you're preparing a long-form article or a quick social media post, the drafting process determines whether your audience stays engaged or bounces within seconds.
Too many content creators skip the structural planning phase and jump straight into writing, which leads to rambling paragraphs, unclear arguments, and weak calls to action. Good blog drafting tips can transform your workflow from chaotic to efficient. The difference between a mediocre post and a high-performing one often comes down to how well you organized your ideas before hitting publish.
In this guide, you'll learn a step-by-step process for structuring your blog content so every draft moves closer to a polished, audience-focused final piece. If you're exploring how AI post draft generation can accelerate this process, the structural foundations covered here will make those tools far more effective.
Key Takeaways
- Outline your post structure before writing a single sentence of body content.
- Each section of your blog draft should serve one specific purpose for the reader.
- Use formatting elements like subheadings and lists to break up dense paragraphs.
- Editing for structure is just as important as editing for grammar and style.
- A strong content creation workflow reduces revision time by up to 40 percent.

1. Start with an Outline, Not a Blank Page
The single biggest mistake bloggers make is opening a blank document and trying to write their way to a finished post. Without an outline, you're essentially building a house without blueprints. You might end up with something that stands, but the rooms won't flow logically, and you'll waste hours rearranging walls. An outline forces you to make structural decisions before the writing begins, which saves time during both the drafting and editing phases.
Your outline doesn't need to be elaborate. Start by writing your main argument or thesis in one sentence. Then list three to five supporting points that build toward that thesis. Under each supporting point, jot down the specific evidence, examples, or data you plan to include. This skeleton becomes your roadmap, and it prevents the common problem of going off on tangents that dilute your core message.
Choosing Your Outline Format
Different types of blog content call for different outline formats. A how-to guide works best with numbered steps, while a comparison post needs a side-by-side structure. Opinion pieces benefit from a thesis, counterargument, rebuttal format. Match your outline format to the content type, and you'll find the drafting process becomes almost mechanical. The outline does the hard thinking; the writing fills in the details.
For blog posts specifically, I recommend a tiered approach. Start with your H2 headings as the top level, then add bullet points underneath for what each section will cover. If you know specific statistics or quotes you want to include, note them in the outline too. This level of preparation means that when you sit down to write, you're never staring at a blank cursor wondering what comes next. Your creation process becomes deliberate, not reactive.
Keep your outline in a separate document or tool so you can reference it while writing without scrolling past it constantly.
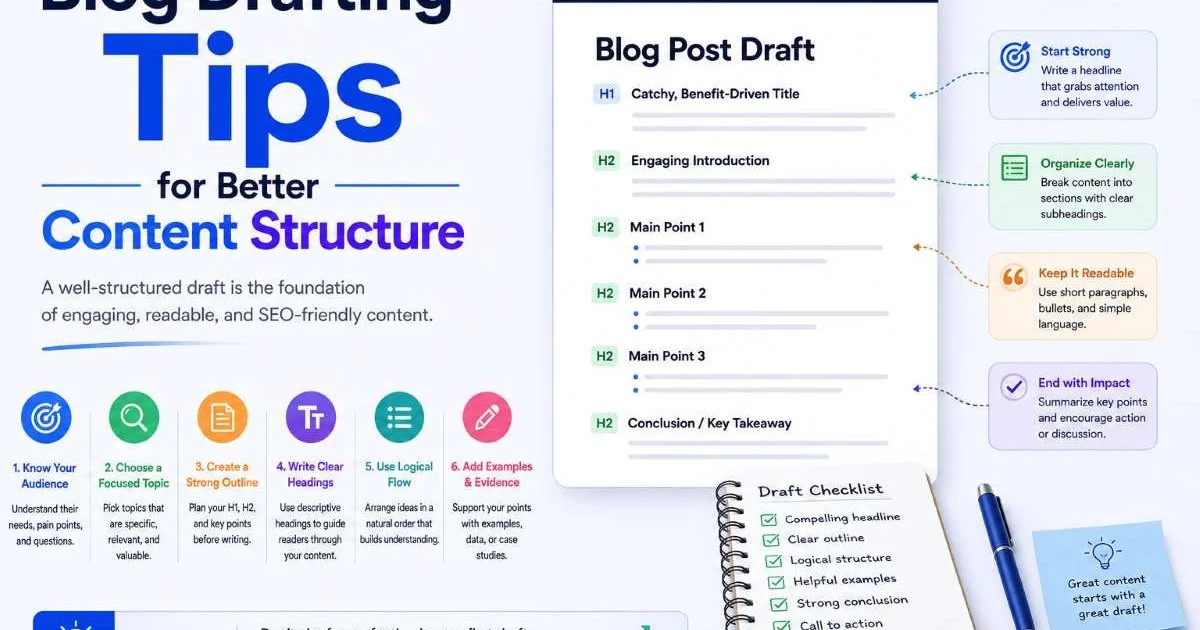
2. Structure Each Section with Purpose
Every section of your blog post should answer a clear question or fulfill a specific function. If you can't articulate why a section exists, it probably shouldn't. The introduction hooks the reader and establishes the stakes. The body sections deliver on the promise made in the headline. The conclusion synthesizes the main points and directs the reader toward an action. When each section has a job, the whole post feels tight and purposeful.
A practical way to test section purpose is to write a one-sentence summary of each H2 before drafting the full content. If two sections have nearly identical summaries, merge them. If a section's summary feels vague ("This section talks about tips"), redefine it with specificity ("This section explains how to structure introductions for maximum retention"). That precision in planning translates directly into precision in your writing.
The Role of Subheadings
Subheadings (H3 tags) serve as signposts within longer sections. They break up what would otherwise be intimidating walls of text, and they give readers permission to skip ahead to the part they care about most. Good subheadings are specific and descriptive, not clever or cryptic. "How to Write a Strong Opening Sentence" is better than "Getting Started" because it tells the scanner exactly what they'll find below.
Think of your H2 headings as chapters and your H3 headings as scenes within those chapters. Each one should advance the narrative. In social media content and shorter posts, subheadings may not be necessary, but for blog articles over 800 words, they're practically mandatory. Readers on the web process information differently than readers of print; they need visual anchors to navigate your content efficiently. Never treat subheadings as decoration.
Not every section needs an H3. Use them when a section runs longer than four paragraphs or covers multiple subtopics.
3. Write for Scanners First, Readers Second
Research from the Nielsen Norman Group consistently shows that most web users scan pages rather than reading them word by word. This doesn't mean your writing should be shallow. It means the structure of your content needs to reward scanning behavior. Front-load your most important information. Put the key takeaway at the beginning of each section, not the end. Use formatting to make your best points impossible to miss.
The inverted pyramid model from journalism works exceptionally well for blog drafting. Lead with the answer or the most valuable insight, then provide supporting detail, then offer background context. Most bloggers do this backwards: they build up context, explain their reasoning, and finally deliver the point. By then, the scanner has already left. Flip the order, and you capture both the quick scanner and the deep reader.
Formatting Elements That Work
Bold text draws the eye to key phrases. Bulleted and numbered lists break complex ideas into digestible chunks. Short paragraphs (three to four sentences) create white space that makes pages feel less overwhelming. Tables present comparative data far more clearly than prose. Each of these elements is a structural tool, not a cosmetic choice. When you're drafting tips or step-by-step instructions, lists are almost always superior to paragraph form.
For those who also manage social media alongside their blog, the same scanning principles apply to post creation on platforms like LinkedIn, Twitter, and Facebook. Short sentences, line breaks, and bold hooks at the top of your posts perform better than dense paragraphs. The structural thinking you develop for blog writing transfers directly to social media writing. When using AI summarization tools to repurpose blog content into shorter social posts, good original structure makes the summarization far more accurate and useful.
Check Also: How to Edit AI Blog Writing for Better Rankings
"Structure isn't the enemy of creativity; it's the framework that gives creativity room to breathe."
One practical exercise: after finishing a draft, highlight every sentence that contains a core insight or actionable tip. If those highlighted sentences aren't visible to a scanner (placed in headings, bold text, list items, or opening sentences of paragraphs), restructure until they are. This simple test catches most structural problems before they reach your audience.
Read your draft on a mobile device before publishing. Over 60 percent of blog traffic comes from phones, and poor structure is even more painful on small screens.
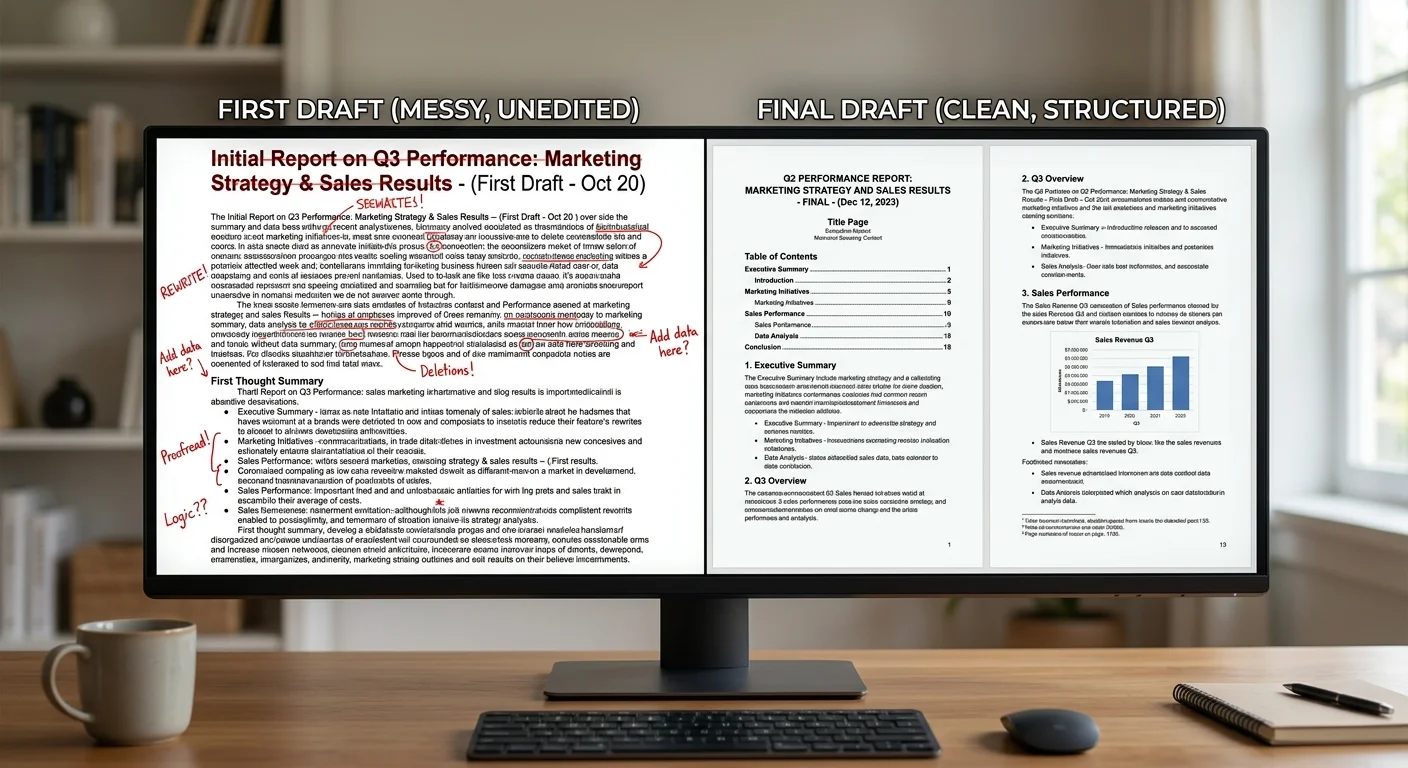
4. Edit the Structure Before the Sentences
Most writers jump straight to line editing: fixing grammar, tightening sentences, swapping words. That's important, but it should come second. Your first editing pass should focus entirely on structure. Does each section flow logically from the previous one? Are there gaps where the reader might get lost? Is any section doing too much or too little work? Structural editing catches the problems that sentence-level editing never will.
| Structural Issue | Symptom in Draft | Fix |
|---|---|---|
| Missing transition | Reader feels jarred between sections | Add a bridge sentence connecting ideas |
| Section overload | One section is twice as long as others | Split into two focused sections |
| Redundancy | Same point made in two places | Merge and consolidate into strongest version |
| Weak conclusion | Post just stops without synthesis | Add a summary that points to action |
| Buried lead | Best insight appears in paragraph four | Move the key point to the section opening |
The Reverse Outline Technique
Here's a technique that professional editors use regularly. After completing your draft, create an outline from the finished piece by writing one sentence summarizing each paragraph. This "reverse outline" reveals structural problems that are invisible when you're deep in the text. You'll spot paragraphs that don't connect to the section's purpose, sections that are in the wrong order, and transitions that don't actually transition.
Compare your reverse outline to your original outline. The differences tell you exactly where the draft went off track. Sometimes the draft improved on the outline, and that's fine. But often you'll find that your strongest material got buried under qualifications and tangents. The reverse outline makes these problems objective and fixable. It transforms structural editing from a gut-feeling exercise into a systematic one.
Don't skip structural editing because you're eager to publish. A well-structured average post outperforms a poorly structured brilliant one every time.
After your structural edit, then move to sentence-level polishing. Check for passive voice, eliminate filler phrases, and tighten your word choices. This two-pass approach, structure first and sentences second, is faster than trying to do everything at once. Your content creation process becomes repeatable and reliable, which matters enormously when you're publishing on a consistent schedule.
Frequently Asked Questions
?How do I build a tiered outline for a blog post draft?
?Is outlining first really faster than free writing for blog drafts?
?How much time can a strong content creation workflow actually save?
?What is the reverse outline technique and when should I use it?
Final Thoughts
Strong content structure isn't a bonus; it's the foundation that everything else rests on. The blog drafting tips in this guide boil down to one principle: plan your structure deliberately, then write to fill it. Start with an outline, give every section a clear job, format for scanners, and edit structure before sentences.
These habits won't just improve individual posts. They'll transform your entire writing and content creation workflow into something faster, more consistent, and more effective for your audience.
Disclaimer: Portions of this content may have been generated using AI tools to enhance clarity and brevity. While reviewed by a human, independent verification is encouraged.